 Free OZ/NZ Shipping at $99!
  10-20% Off Storewide - Hurry Limited Time!
 Shop Now - Afterpay Accepted
Simple and Adorable Braids for Your Little Girl
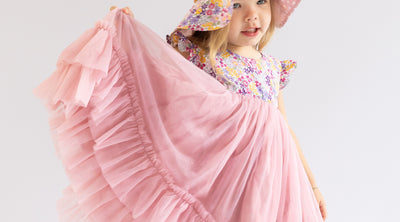
Image: https://www.oobi.com.au/products/molly-new-minifloral-dress
Let’s be honest – sometimes, cute pigtails are all you have time or energy for, and that’s perfectly fine! If, however, you want to add a touch of variety to your little girl’s hair routine or just enjoy braiding hair, consider these simple and adorable braids.
Since “simple” is the keyword, we’ll start with the basic braids every hairstyle enthusiast should know. Once you get the hang of the basics, you can venture into more intricate and complex hairstyles.
Braids 101: Master the Basics
One can argue that hairstyles like the fishtail or French braid aren’t basic, as they take time and skill to execute. However, nailing these hairstyles is relatively easy with a bit of practice and patience. Before you know it, it’ll be muscle memory.
How to Do a Fishtail Braid
Is your little girl dreaming of being a mermaid? If so, the fishtail braid is the way to go. As the name suggests, this hairstyle’s interwoven pattern resembles a fish’s scales. It’s precisely this eye-catching appearance that sets the fishtail braid apart from traditional braids.
Here’s how to do this intricate design:
- Smooth your daughter’s hair into a side ponytail. Ideally, the hair should be unwashed for two to three days to help with styling.
- Split the ponytail into two equal sections.
- Add a small piece from the outside of one section to the inside of the other—the smaller the pieces, the tighter the fishtail braid.
- Repeat Step 3 down the length of your little girl’s hair.
- Secure the braid with a clear elastic band.
How to Do a Dutch Braid
A Dutch braid is one of the most beloved braid hairstyles, and for a good reason. It has a distinctive appearance, works with any hair type (as well as dry or wet hair!), and lasts for a long time, including overnight.
Follow these steps, and you’ll become a Dutch braid expert in no time:
- Part your daughter’s hair down the centre.
- Brush out any tangles.
- Grab three small hair pieces, starting at the hairline.
- Weave the right hair piece under the middle one.
- Plait the left hair piece under the “new” middle piece.
- Repeat Steps 3 and 4 down the length of your daughter’s hair, each time adding more hair.
- Switch to a regular three-strand braid once you reach the nape of her neck.
- Secure the braid with a tight, elastic band.
You can also do one Dutch braid on each side for a playful mirrored look.
How to Do a French Braid
People often confuse the French and Dutch braids. And who can blame them? After all, these two braid types are virtually the same. The only difference is braiding the three hairpieces over instead of under each other.
So, to pull off a French braid, follow the steps outlined in the Dutch braid section, slightly tweaking Steps 4 and 5.
How to Do a Rope-Twisted Braid
The rope-twisted braid is perfect for those hectic days when you don’t have enough time, yet you want to create a cute hairstyle for your princess. Here’s what to do:
- Tie your daughter’s hair into a ponytail of choice.
- Divide it into two equal sections.
- Twist both sections clockwise.
- Weave these two (now twisted) sections together, again moving clockwise.
- Secure the now large twist braid using an elastic band.
How to Do Cornrows
Cornrows are an exceptionally versatile hairstyle that can be braided into virtually endless design patterns. Best of all? This hairstyle is equal parts beautiful and protective, making it a stylish and safe choice for your little girl. Here’s a step-by-step tutorial on achieving the simplest form of this fabulous hairstyle, the straight-back cornrows:
- Prep your daughter’s hair with styling butter to prevent frizz.
- Using a rattail comb’s tail end, part her hair into sections. The smaller the sections, the thinner the cornrows.
- Divide one hair section into three equal parts, starting at the hairline.
- Begin a simple three-strand braid at the section’s base.
- As you braid, add more hair from that section into the cornrow. Try adding an even amount of hair each time for a more uniform look.
- Once the braid is no longer attached to the scalp, continue braiding it as a regular three-strand braid.
- Secure the ends by curling them around your finger or using a rubber band.
- Repeat Steps 3-7 around your little girl’s head.
Take Your Daughter’s Braids to the Next Level
These braids will look fabulous on their own – there’s no doubt about it! But imagine how enchanting they’ll look when accessorised! Depending on the hairstyle you’ve chosen, you might cover the elastic band with an adorable scrunchie or adorn the top of your little girl’s hair with a delightful bow (or two!)
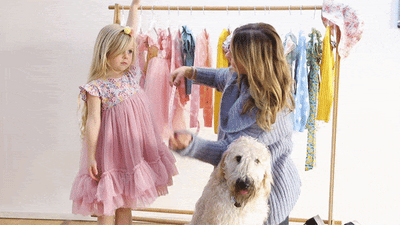
In fact, any statement piece from Oobi’s fantastic hair accessory line will take your daughter’s braids to the next level. Even better, you can ditch the braids altogether during busy days and let a stylish accessory from Oobi do all the talking.
Leave a comment